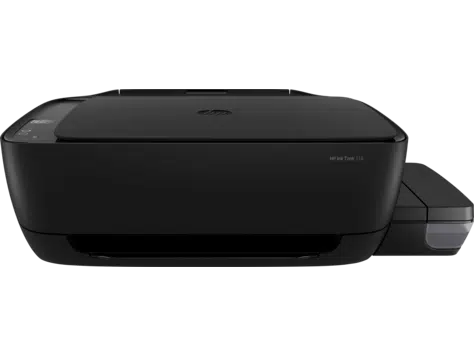
HP Ink Tank 316 Driver
HP Ink Tank 316 Driver
Table of Contents
How to Install the HP Ink Tank 316 Driver?
To download the HP Ink Tank 316 Driver, click on the link below and open a folder on your computer. Once the file has finished downloading, double-click on the exe file to start the installation wizard. Follow the prompts to complete the process. The installation wizard will guide you through the rest of the process. Once the driver installation is complete, your printer will be ready for use. If you have any problems, do not hesitate to contact HP customer support. They will be happy to help.
Installing the printer driver:
If you’re unfamiliar with installing printer drivers, there’s a simple procedure to follow. Download the HP Ink Tank 316 driver from HP’s website. Then, double-click on the.exe file and follow the onscreen instructions. Make sure to choose a compatible driver for your operating system. You may need to download the latest version of the HP Ink Tank 316 driver for your printer.
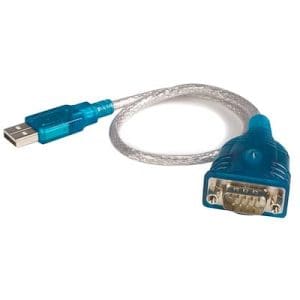
If you’re using an older version of Windows, you can install the driver manually by following instructions on HP’s website. Once you’ve done this, you can connect your printer to your computer and perform the installation process. Once the installation process is complete, be sure to connect the USB cable to the printer and restart it. Then, you’re all set to print. To complete the process, print a test sheet to verify the installation.
After you’ve installed the driver, the next step is to install HP’s software. You can choose which HP software to install, although it is recommended to use the default software for your computer. Once you’ve done that, you’ll need to accept the license agreement and wait for the installation to complete. After the installation is complete, you’ll have to choose the purpose of your HP printer. After you’ve selected a purpose, select a software that’s appropriate for your use.
Registering the printer:
HP has released updated firmware for the HP Ink Tank 316 printer. This update has a variety of benefits, including improved reliability, print quality, and the ability to print on new types of paper. If you have not yet done so, you should download the new firmware and connect it to your computer. Follow the prompts on your computer screen to install the new firmware. Once installed, restart your computer.
The newer HP Smart Tank series will be released by the company in December 2019 and will be updated in Fall 2021. It uses high-volume bottles of ink for low operating costs. However, the upfront cost is higher. For most people, it’s worth the extra money for these features alone. After all, who doesn’t want to save money? The HP Ink Tank 316 printer is a great option for the home or office user who needs a multifunction printer.
Using HP Easy Start to set up your printer:
The first step to using HP Easy Start to set up your HP InK Tank 316 printer is to download the appropriate drivers. You can find the correct drivers from the manufacturer’s official website. Once you’ve downloaded the proper drivers, you can run the installation wizard. Once the installation process is complete, you need to restart your computer. After you’ve installed the correct drivers, you’re ready to start using your new printer.
The HP 310 All-In-One Ink Tank Printer is an excellent choice for home and small office users who need to print color pages. The high-capacity ink tank provides ample printing capacity and spill-free refills. It also includes USB connectivity for easy use and convenience. Although this printer has numerous advanced features, you will need to download full feature drivers to enable it fully.
Once the HP Easy Start installer has finished installing the drivers, you should run the firmware downloader. This can be done on the printer or on the computer. After installing the drivers, you can restart the printer and change settings if needed. To check if you’ve installed the latest firmware, go to the manufacturer’s website. While downloading the firmware, make sure that you unplug your printer from the power cord. Wait for 5 to 10 minutes, then plug it back in. Then, hold down the stop button for two to three seconds. The printer will display a network setup tool and prompt you to select the network factory default.