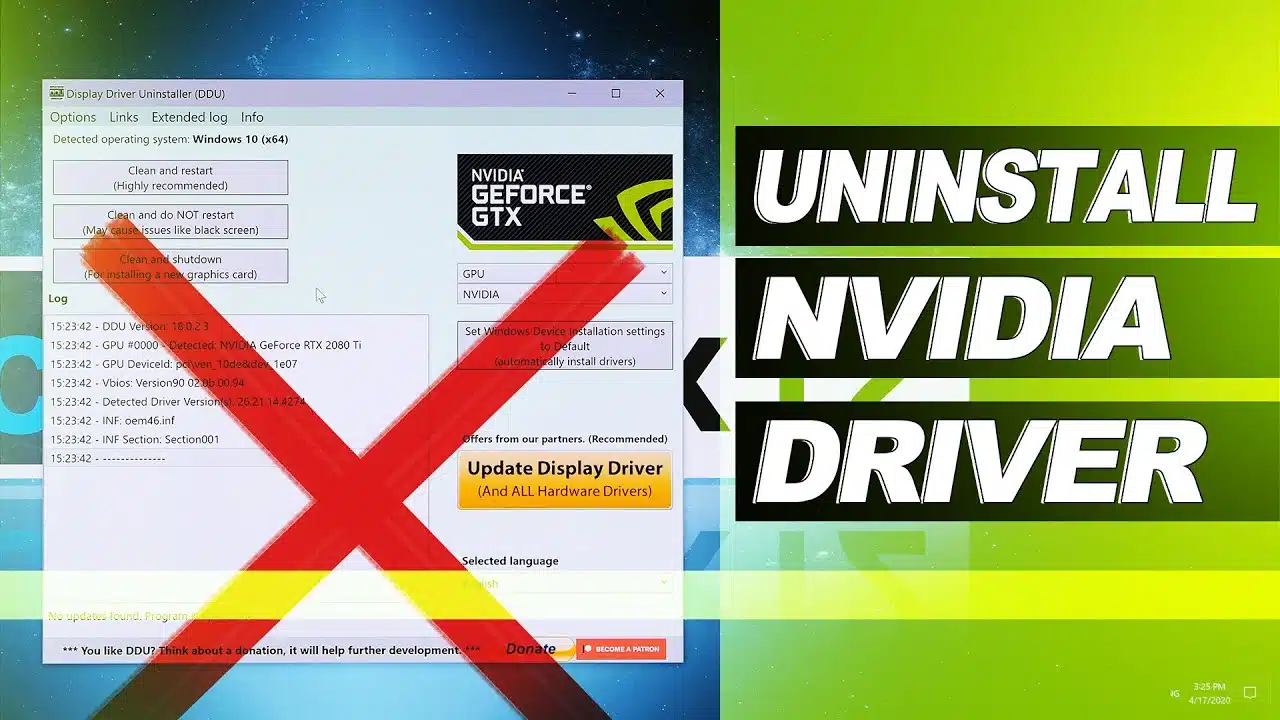
Uninstall Nvidia drivers
Published:
January 4th, 2022
Updated:
January 4th, 2022
Developer:
Version:
18.0.4.7
Platform:
Uninstall Nvidia drivers Windows 32-bit/64-bit
Table of Contents
Uninstall Nvidia drivers:
You may have noticed that your computer uses a lot of space. If you need to delete this excess space, you should uninstall Nvidia drivers. By doing this, you will be able to free up more space on your device and install the latest version of your graphics card software. You can find a step-by-step guide to uninstall Nvidia drivers below. You should also download PowerMyMac from Apple to perform a quick scan of your installed applications.
Locate your Nvidia Drivers to uninstall them:
Next, locate your Nvidia driver program. To find it, right-click on it and select “Quit”. You can also double-click it to open it in your system’s task manager. Once you’ve found it, delete it from the Windows Registry by deleting the relevant keys. Then, restart your PC to ensure that the uninstalled files are gone. If you have a corrupted registry, you can always re-install the NVIDIA drivers from the NVIDIA official download site.
Also, Uninstall Nvidia drivers using Registry:
You can also uninstall NVIDIA drivers by using a registry editing program called Regedit. If you’re not comfortable with navigating through registry editors, you can open the Registry Editor by using Windows’ search tool. Once there, type Regedit to open the registry editor. Then, delete all the NVIDIA folders from HKEY_CURRENT_USERSoftware and HKEY_USERS.DEFAULTSoftware. Then restart your computer and check if your computer now runs NVIDIA drivers.
Once the driver removal process has finished, you’ll need to uninstall any remaining Nvidia software or drivers. To uninstall NVIDIA drivers, you’ll need to click on the device manager icon on the taskbar and then select “Device Manager” from the list of available tools. Then, follow the steps described above to clean up the leftover items, if any, that may be contributing to the problem.
More instructions to Uninstall Nvidia drivers:
Next, you should click on the “DEVICE MANAGEMENT” icon in the taskbar. This will open the Control Panel. Now, find the NVIDIA GeForce device and select Properties. Then, click on the Driver tab. If the driver is already installed, it should be visible in the Control Panel. If not, click on the “Device Manager” icon. Then, you can find and delete the NVIDIA software by typing the name of the device into the Run search bar.
Proceed to uninstall Nvidia GPU Drivers:
Once you have removed all Nvidia software and drivers, you can proceed to uninstall Nvidia GPU drivers. If the GPU isn’t working properly, you can uninstall this driver by clicking the Win+R button on the taskbar and then typing “control panel” into the Run search field. From there, click on the “drivers” tab. During the next step, you can choose to install the Bit Driver Updater.
Once you have located the Nvidia graphics card, you should click on the “Nvidia” tab and click on it. Then, you need to locate the nvidia.exe file. This file is the Nvidia driver’s installation folder. Once you have found it, you can uninstall it. If you do not find the right program, simply click on the ‘Nvidia’ tab again. This will remove the Nvidia.
Uninstall your Nvidia Graphics Card Drivers:
Next, you need to uninstall the Nvidia graphics card drivers from your system. You can manually download them from the NVIDIA website and install them on your PC. After you’ve downloaded the driver, you need to restart your computer to let Windows complete the process. After uninstalling the Nvidia drivers, you can verify the remaining versions of the software on your PC. You may need to try several different versions before finding the right one. The results will vary depending on the operating system and the number of updates installed on your PC.
After uninstalling Nvidia drivers, you should also check whether there are any leftover files in the system. It is important to make sure that there are no traces of these files in the system. Alternatively, you can manually uninstall the driver from the manufacturer’s website. In this case, you should be able to find the Nvidia drivers. You can also uninstall the program using the Windows task manager.
Uninstalling Nvidia drivers Properly:
Finally, you should clean up any remaining files. You can run CCleaner to delete the Nvidia graphics drivers and other unwanted programs from your computer. This program can also help you uninstall invalid Windows registry entries and invalid files. Once you’ve cleaned up the registry, restart your computer to avoid the blue screen of death. You should also check the other programs running on your computer, such as the video card. If any of them is causing the problem, you can uninstall them from your PC by following the steps above.